 |
Show Changes |
 |
Edit |
 |
|
 |
Recent Changes |
 |
Subscriptions |
 |
Lost and Found |
 |
Find References |
 |
Rename |
| Search |
History
| 12/8/2010 3:57:25 PM |
| -77.164.62.11 |
| 12/5/2010 5:00:29 PM |
| 86.137.178.239 |
| 6/13/2010 3:22:21 PM |
| 118.142.22.146 |
| 10/24/2009 10:49:28 PM |
| -86.155.26.93 |
| 10/24/2009 10:45:01 PM |
| -86.155.26.93 |
 |
List all versions |
| Link to Wiki HomePage | Link to the main site: http://www.fordsontractorpages.nl | Link to the forum: http://www.fordsontractorpages.nl/phpbb3 |
This page is an illustrated story about overhauling a New Major. It will gradually be fine-tuned into a cohesive article.
Henrietta has developed a loud squeaking noise and a heavy knock and it is all my fault! Under a bit of pressure, I took her out without changing the engine oil for about a year. Not that she gets that much work but here in lies the cause of the problem.
Henrietta is a petrol/paraffin (kerosene) fueled tractor. Unless these engines are working very hard and hot fuel tends to bleed past the pistons and dilute the oil. So this has to be changed at frequent intervals to avoid problems. I was rushed. I did not do it before the season started and now I must suffer the consequences. Just hope I have not completely ruined her as parts for these models could be a bit difficult.
Photos:
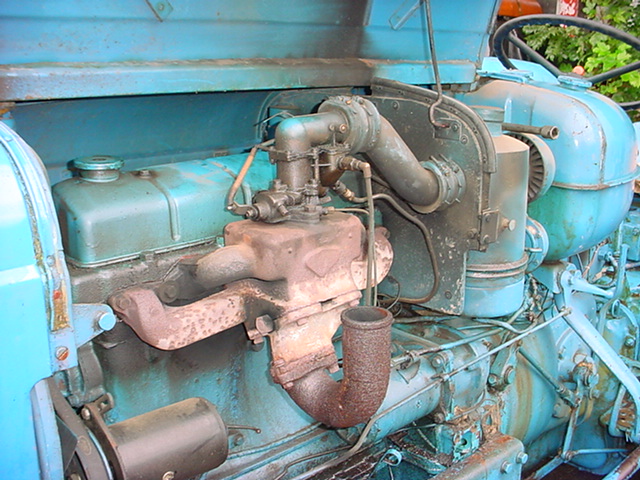
This is the vapouriser on the petrol/paraffin engines. Rather a large lump of metal. Can be subject to heat cracking and metal crystallisation. Virtually impossible to get a new one.

The porting on the head is different too.

The valves go in at an angle rather than straight down like the diesel. Note no rotator caps on the exhaust valves and the lock-tabs instead of spring washers on the nuts and studs.
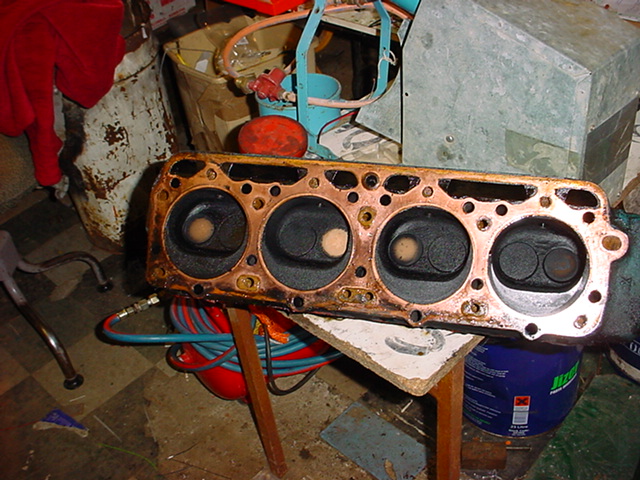
The head is off! A bit carbon-y but not too bad considering it has been on for over 50 years as far as I know.
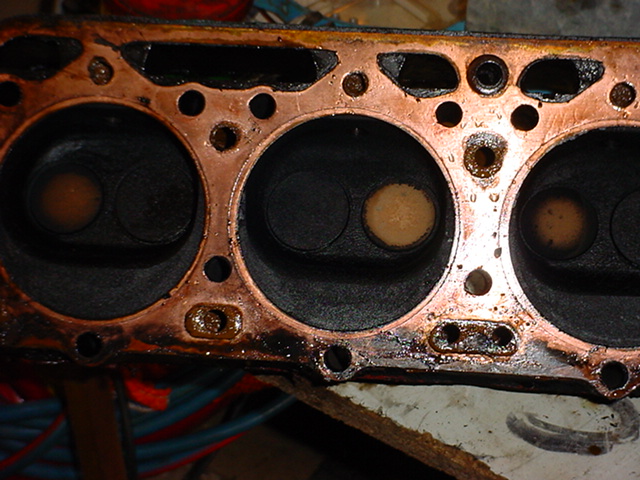
The petrol/paraffin engine has combustion chambers in the head, rather than the ones in the piston like the diesel version.
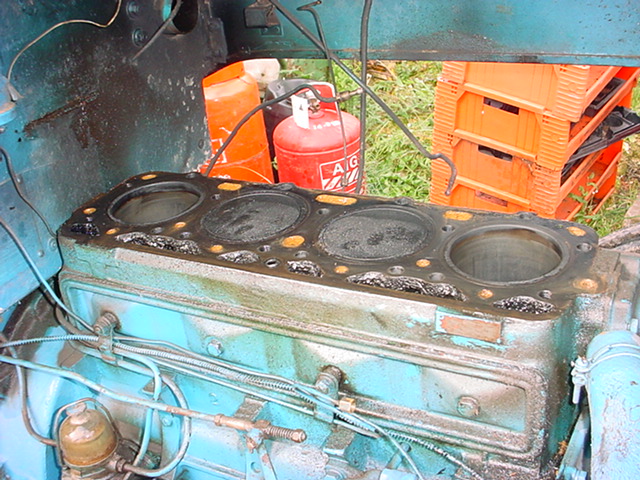
She also has flat topped pistons. Unlike the petrol version, the bore size is the same as the diesel so if she needs liners, diesel ones will fit.
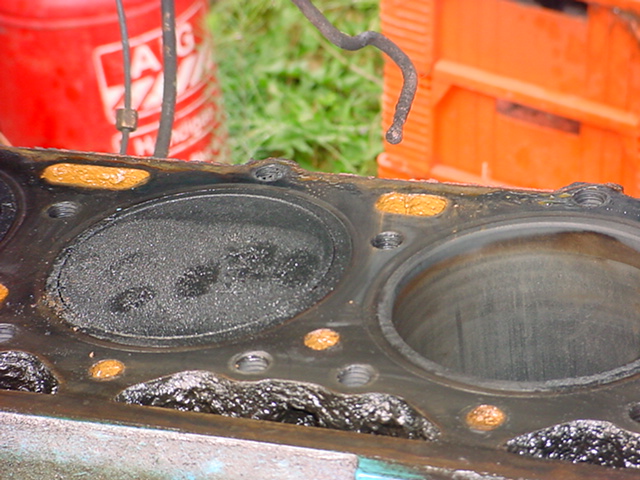
On checking, the liners are still within specs after 50 years so we will give them a polish and fit a new set of rings. No sign of a seized piston either.

The next job will be to remove the sump. I am going to approach this job with the view to removing the engine so I intend to take the side frames, radiator, front block and axle off in one piece. This is how we used to do this, it is quite simple and reduces the lifting involved as it will run out on the front wheels.
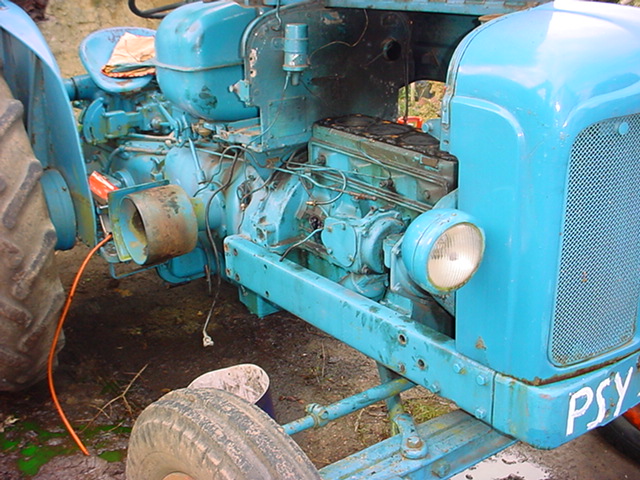
Take all the bolts out from the frame and the engine front plate mounting. Don't forget the drag link on the other side.
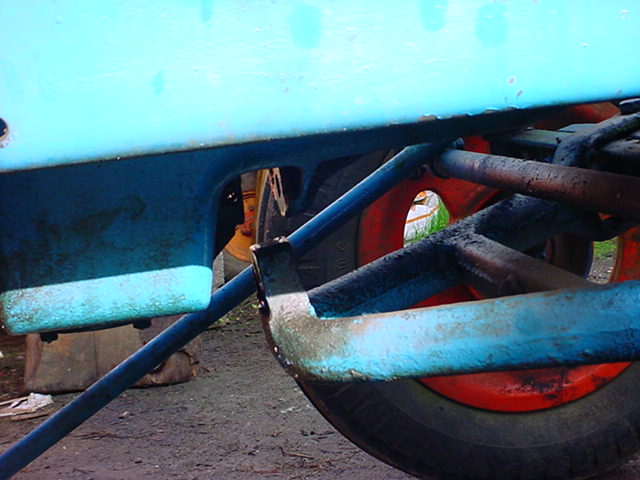
Support the engine with a jack under the clutch housing. Remove the radius rod pivot pin from the sump and raise the jack. The radius rod should drop clear of the sump allowing the axle and frame to be pushed forward.
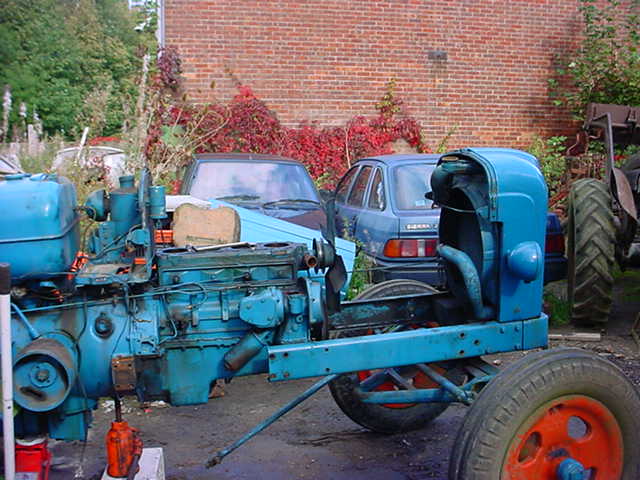
Gently does it. Everything slides out easily. Note I am on my own with no help so it has to be easy.
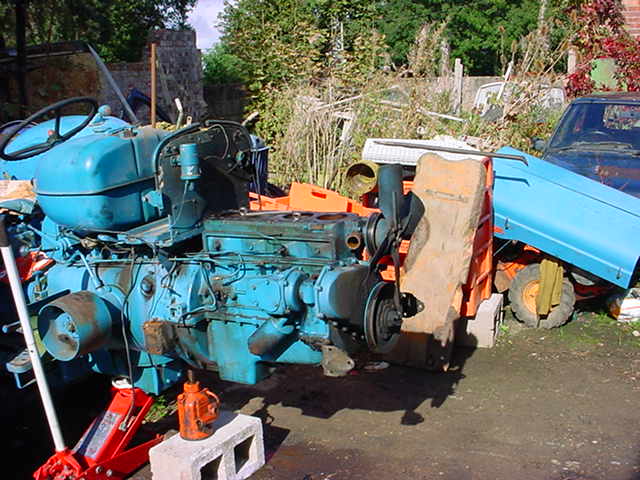
With the front end out of the way, I made sure the engine was well supported as I intend to strip it out to lighten it as much as possible before lifting it out.
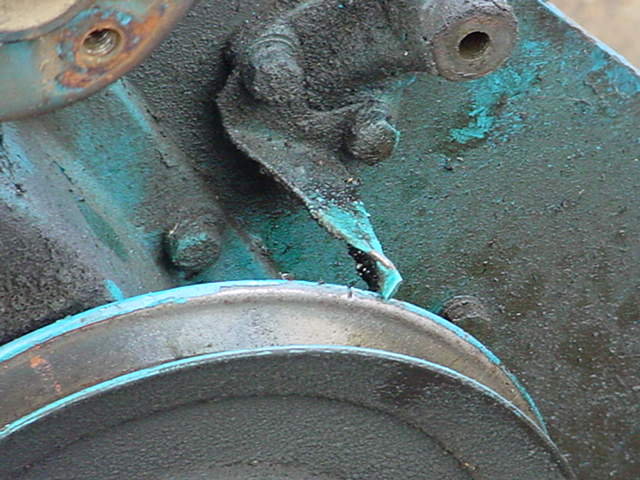
The early engines did not have marks on the flywheel for timing. Just a pointer and a notch on the front pulley. The first job is to remove the starting handle dog and the front pulley. I put the tractor in gear with the brakes on and the wheels blocked then use a large flat punch and big hammer to free off the starter handle dog. Once this has been removed a couple of levers and a tap or two and the front pulley comes off. Next its the timing cover. Early engines did not have any dowels to hold the timing cover or front plate in position. these came with the engine modifications around 1955 when it was found that front end loaders caused movement on the engine mounting plate and the gaskets would fail.
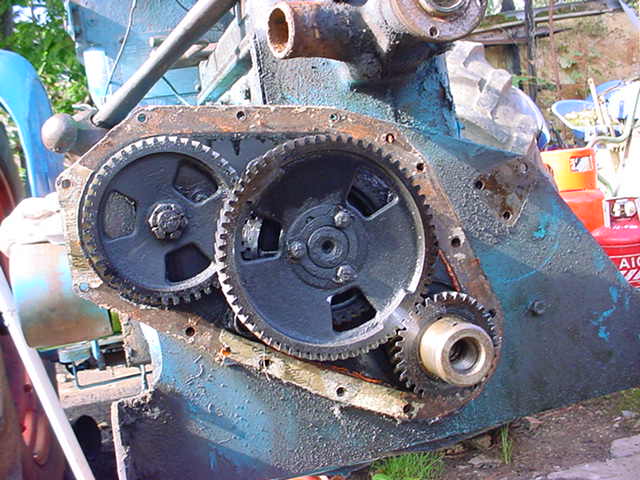
With the timing cover removed the timing marks on the gears can be found. Note the early model three bolt fixing cam shaft gears.
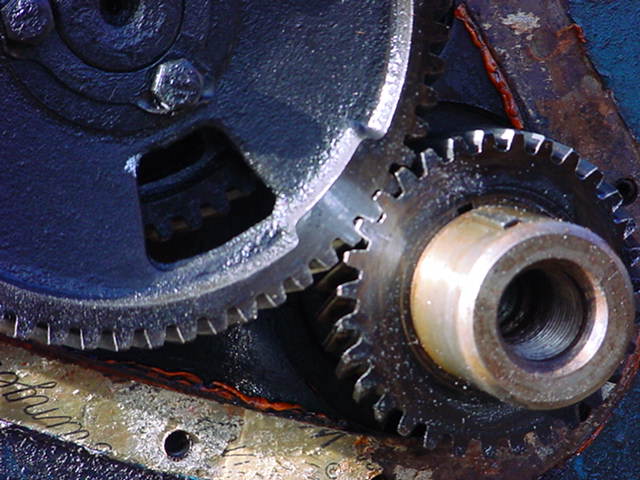
Timing marks crankshaft gear to large gear.
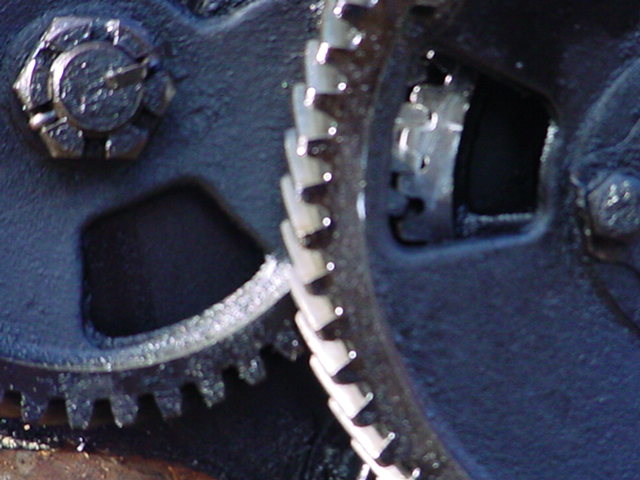
Auxiliary drive shaft to cam shaft timing marks. Also note the split pin and castellated nut on the auxiliary drive shaft. Later models had a Nylocks nut.
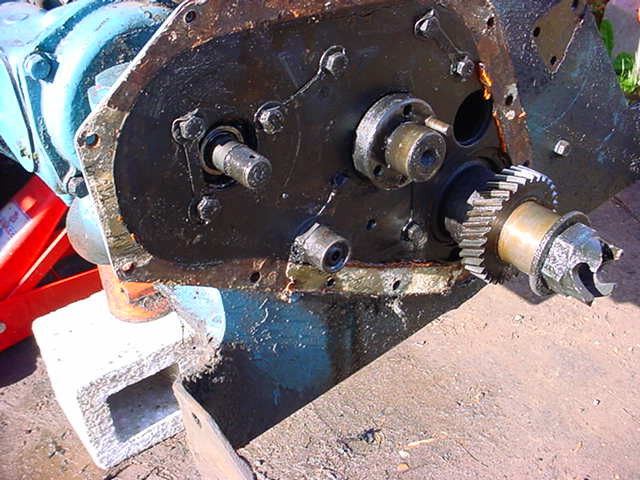
With the timing gears out of the way I release the lock-tabs on all the front plate retaining bolts. Be careful with these as they are different lengths and threads depending on where they go. I am afraid that I have done so many of these that I can afford to throw them all in a can and clean them, then remember where they go back. (Sad is it not?) Note the position of the oil pressure relief valve on the early engine. Later models had this incorporated in the oil pump.
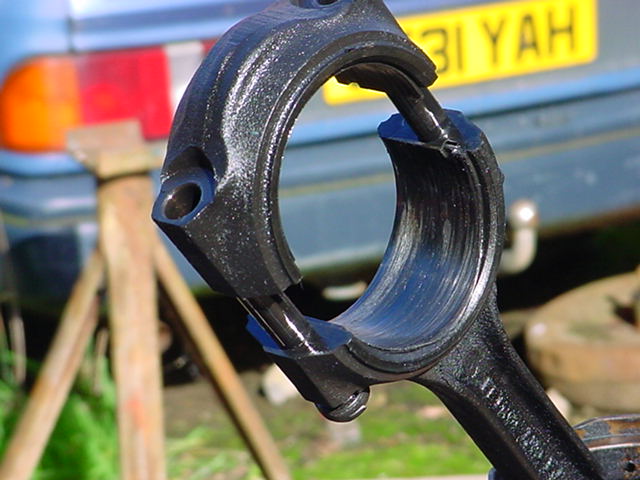
Once the front plate has been removed I take the sump off. Now I find Henrietta's problem. Number ! big end has seized. The bearing is a complete right-off and the crank is scored. Oh Dear.
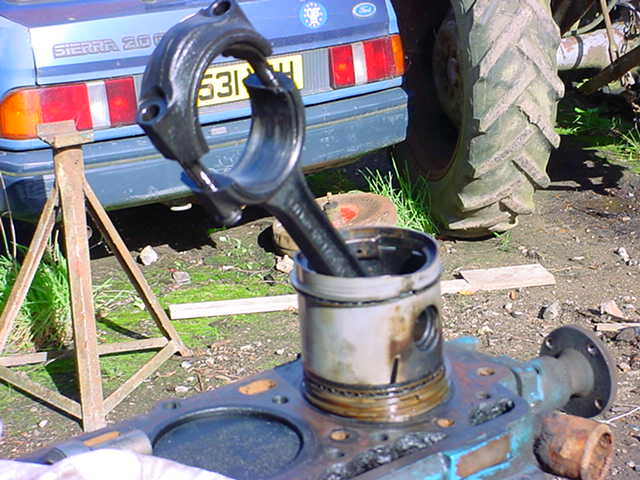
Another view of the damage. I have never seen piston rings like this in all my experience either.
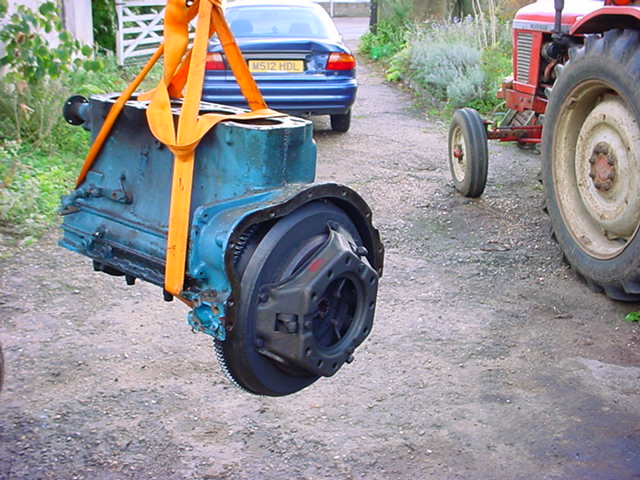
So now I call on Harriet Ferguson and her loader to take the strain. The engine comes out and the clutch sees the light of day. As far as I know this has done 50 years too! I can be reasonably certain of this as I knew where the tractor came from when I bought her. She had been owned by one family until I got her in 1974 and I certainly have never worked on her.
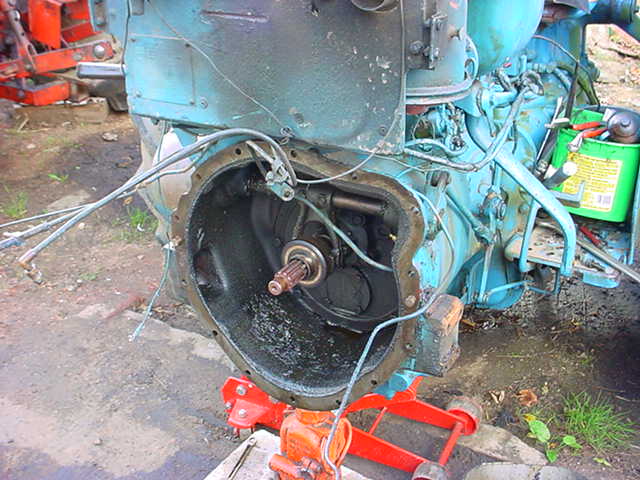
The thrust bearing has seen better days so this will be replaced. It is faluse economy not to replace things like this whilst she is apart.
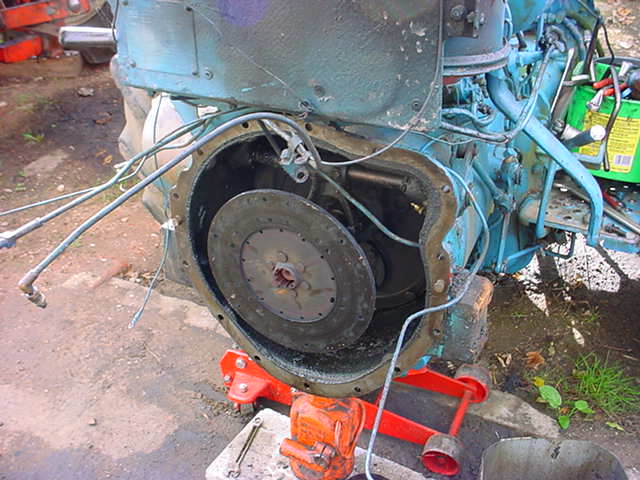
Looks like we need a new gear box oil seal too! She has been leaking a bit of gear oil from the split pin hole under the clutch housing.
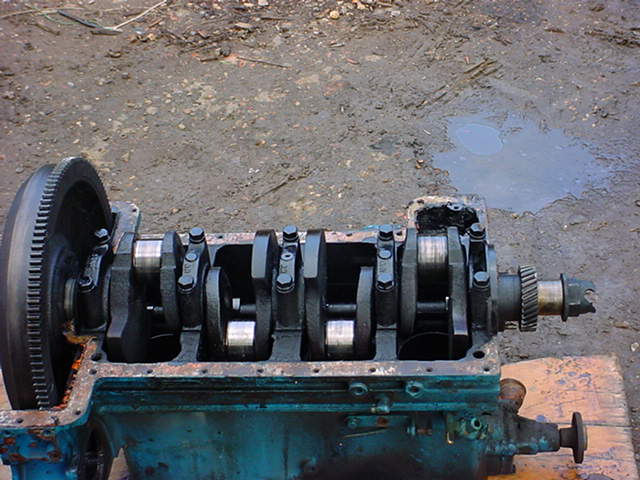
With the engine out and on its back, the damage to the crank can be clearly seen.
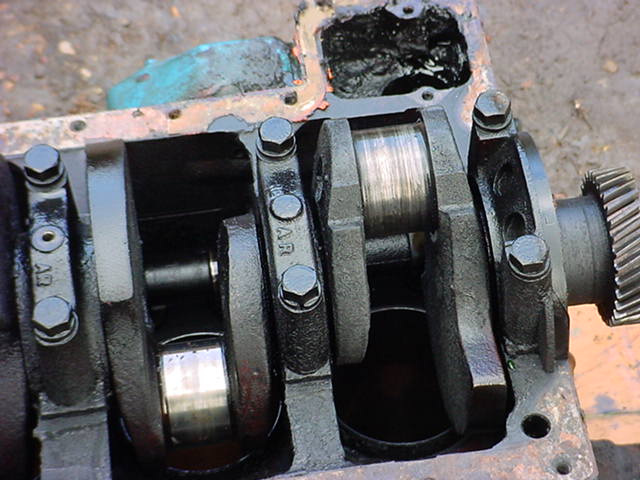
Its not that bad but the crank will require re-grinding.
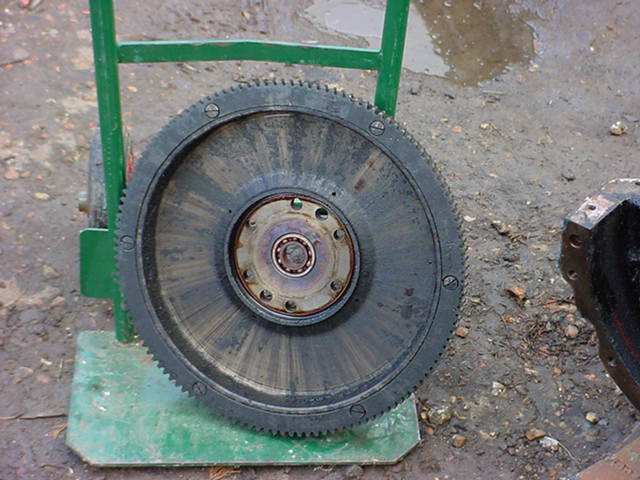
The fly wheel is very light compared to the standard diesel one and even the live clutch version.
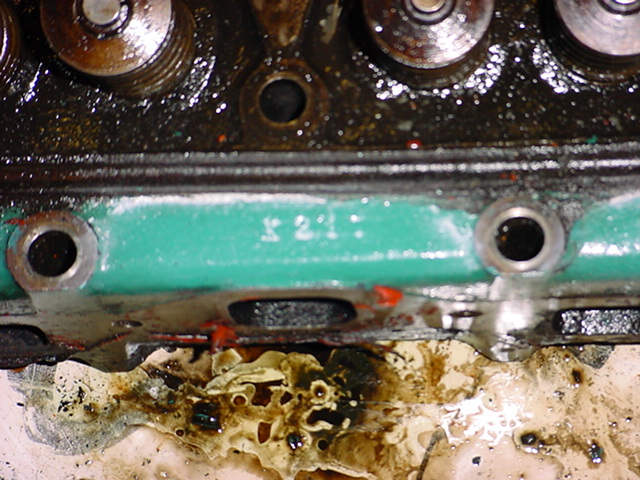
Took a minute just to get a picture of the head casting code.
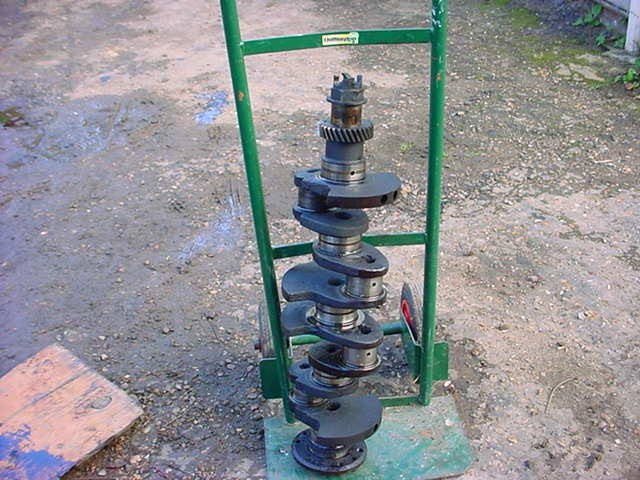
The crank is now out and waiting to go to the engineering shop. These cranks on the early tractors were very fragile. They are hollow and made of cast steel. The slightest knock or drop will cause them to break in half so transport with care Brian! Note the large balancing webs.
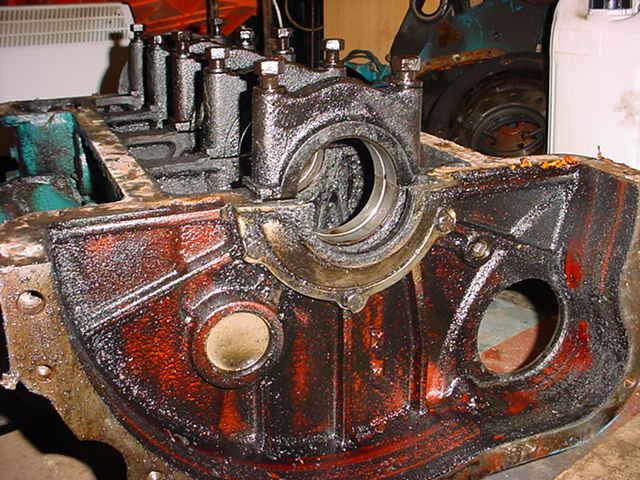
Whilst the crank is being ground, the dirty block is taken into the workshop for a bath in "Gunk". All the bearing caps are put back in their correct places and the two that are the same are marked so there can be no mixup. If a cap is lost the block would have to be line bored to fit a new one. Caps between different engines are not interchangeable. Big end caps also must be replaced where they came from and also the right way round. The numbers marked on the caps must go together or the bearing retaining notches should be on the same side.
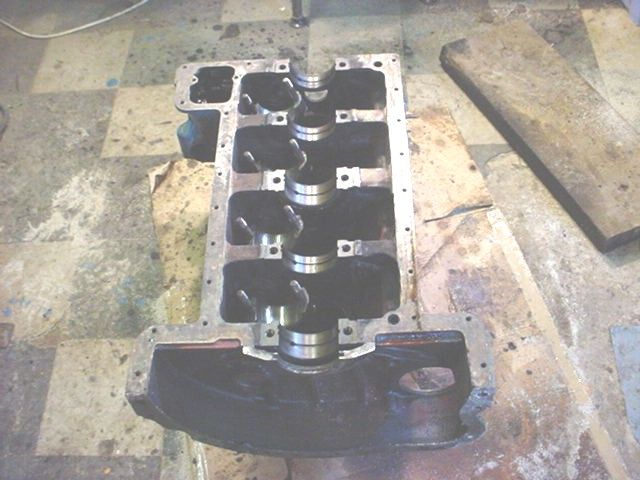
After scrubbing with the "Gunk" it is all washed off with a high pressure washer, blown through all the galleries and given a light coat of oil.

The crank and all the bearings and gaskets arrive and the first job is to fit the pistons. After this the block is turned over and the bearings,a new crank shaft oil seal fitted and crank are replaced. I fill all the galleries with engine oil using an oil can then coat the bearing surfaces with graphite grease before finally fitting the crank. I also lubricate the crank shaft oil seal and give that a coat of graphite grease too. I always tap the seal into the housing with a hammer shaft to make sure it is fully home in the carrier. About 1/8" to 1/4" should protrude at the ends of the carriers when the seal halves are fitted. If the seal is fitted dry, when the rear main is torqued up the seal may jam the crank.
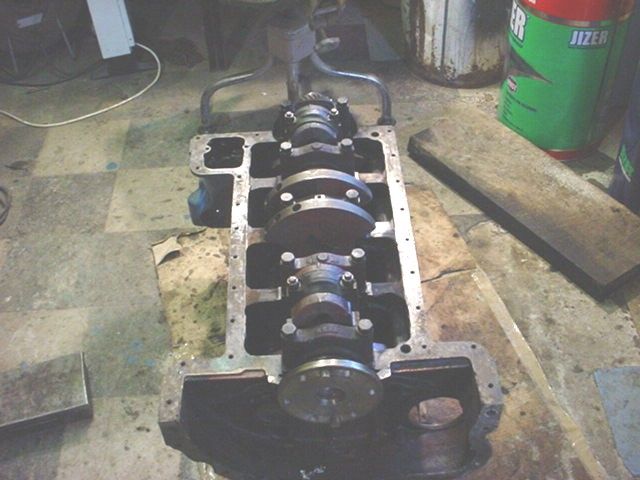
The bearing caps are all fitted and torqued up. I always fit and torque up as I work down the crank. After each bearing is torqued I check that I can still turn the crank. It may get harder to turn as more bearings are tightened but it should still turn OK when all are tight and the pistons are fitted.

All the clutch needed was new liners which I got fitted by a local firm.

I always fit a new pilot bearing and thrust bearing whenever I have a tractor split. I have learnt the hard way that it is false economy not to.
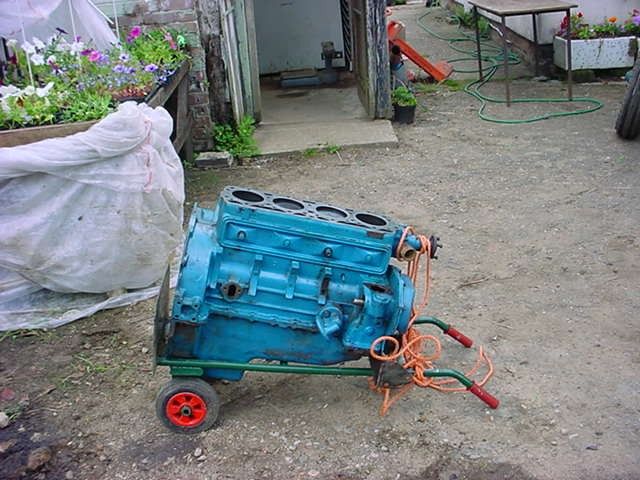
The engine is ready to be replaced. I have only assembled the sump and timing geears and cover at this stage. It is easier to get out of my workshop, the unit is lighter for Harriet to lift and is easier for me to get back in to the clutch as I am on my own. I then fit the head and all the ancillary equipment with the engine in place. It is as good as an engine stand and much easier on the back!
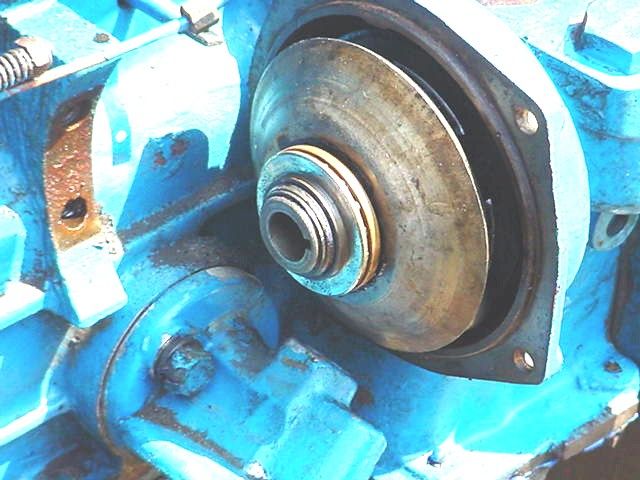
The governor on the petrol/paraffin tractors is a series of balls inside two thrust plates. They have all been out, cleaned and checked before the cover and limkage is refitted.
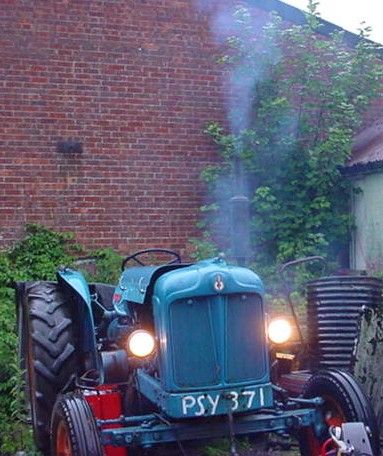
All back together and the moment of truth! Will she start? Of course she will, with a little help from my big start/charge unit. In a cloud of smoke and with a roar off she goes.
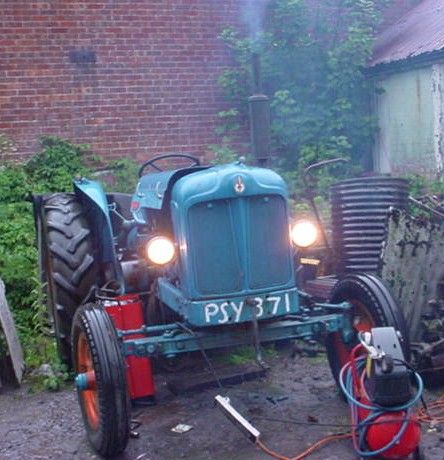
And the somke slowly clears as she warms up. Now to re-torque the head and re=set the tappets and she will be ready for another 50 years.
Link to Wiki HomePage||Link to the main site: http://www.fordsontractorpages.nl
| Link to the forum: http://www.fordsontractorpages.nl/phpbb3 |
If you are new to Wiki, read OneMinuteWiki or VisitorWelcome.
Recent Topics